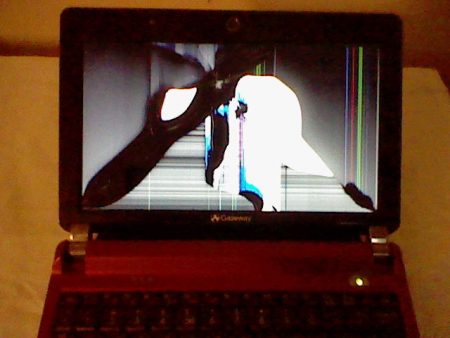
Laptop and netbook screens are notoriously fragile. The Gateway LT2030 netbook has a flimsy upper panel that will easily break if dropped from as little as 3 feet above the ground. In this handy guide, we will step you through the process of ordering and then replacing the 10.1″ display.
Laptop screens are made of liquid crystal matter pressed between two thin glass plates which is why they are called LCDs. The glass and typically weak plastic housing make for a screen that breaks easily if dropped or mishandled.
ORDERING AND AVAILABLE OPTIONS
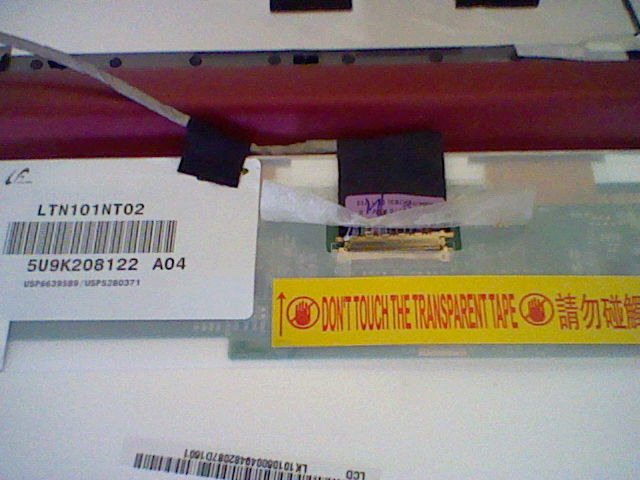
The Gateway LT2030U netbook uses a 10.1-inch WSVGA 1024 x 600 LCD screen. The screen arrived in a large cardboard box with over 4″ of bubble wrap protecting the top and bottom of the fragile glass product. As soon as I had this part in my hands, my curiosity latched onto the model numbers that were haphazardly placed on the backside. The first label read SAMSUNG with the letters D-1URTBE-D. Underneath this stick was another that read LTN101NT06. On the bottom left-hand corner of the back of the LCD the letters, LJ96-05490B appeared on a sticker next to the words LTN101NT06-W01. The original display had the part number LTN101NT01 stamped into its metal rim. These part numbers are critically important for anyone trying to locate these LCD monitors since most websites do not list the OEM manufacturer cross-reference details.
The screen also comes in matte finish or glossy. I recommend choosing a matte finish. Glossy laptop LED screen will be difficult to view indoors or outdoors if any type of light is reflected off the monitor. You should keep this in mind when ordering since some online retailers will not give you a choice.
INSTRUCTION FOR REPLACING THE SCREEN
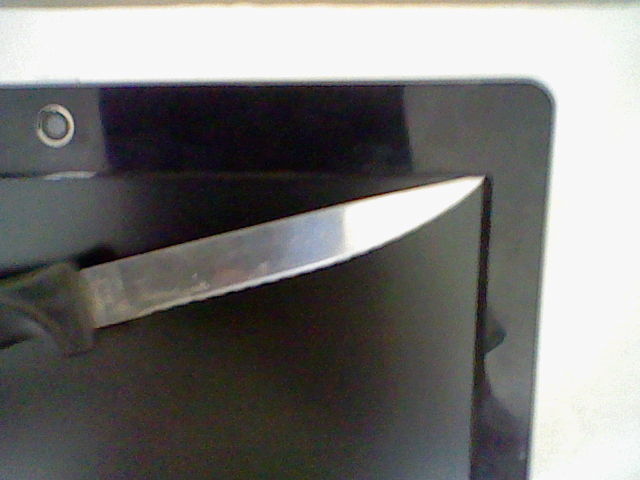
These instructions can help replace your Gateway LT2030u netbook screen. You should have a set of small Phillips screwdrivers, a thin knife blade, and a clean workbench or table available before starting this work. Read all these instructions first before proceeding!
- Disconnect the power to the LT2030U netbook and shut it down safely in Windows 7 Starter SNPC.
- Remove all connected peripherals and close the Gateway netbook case.
- Place the netbook face down on your clean work area with the UM08B31 Li-Ion battery facing towards you.
- Depress both the battery release tabs at the same time and pull it out of the LT2030u case.
- Flip the netbook back over again and open it so that the display is fully extended from the front keyboard. Removing the Li-Ion battery from the Gateway netbook allows the display to be fully opened.
- Now, using the thin knife blade, carefully pry away the cover around the broken LCD display. Not the back panel cover of the display, the front panel cover. Start at the upper right or left-hand corner and slowly pry it off, ending at the bottom section. The only thing attaching this cover is some sticky tape material at the top and bottom
- Remove the bottom section of the front LCD cover and set it aside.
- Next, remove the four black Phillips screws that are located on each of the four corners of the LCD panel, which are now exposed because the plastic border cover has been removed. Take special care to put these screws in a container so you can locate them when reassembling the netbook!
- No, I did not miss a step, remove the two black Phillips screws on each side about one inch up from the bottom of the LCD panel next. These are the last support for the rear plastic cover and this step is an easy way to keep your parts in order during this process.
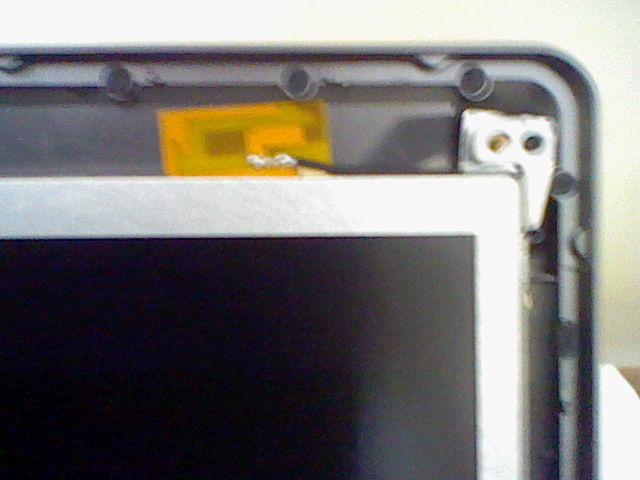
- The microphone at the top needs to be carefully untapped from the back panel.
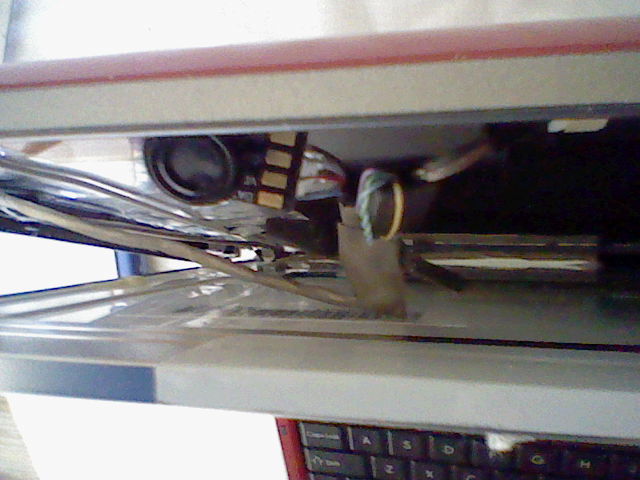
- Looking at the metal hinge assembly, remove the four silver looking Phillips screws holding the panel to it.
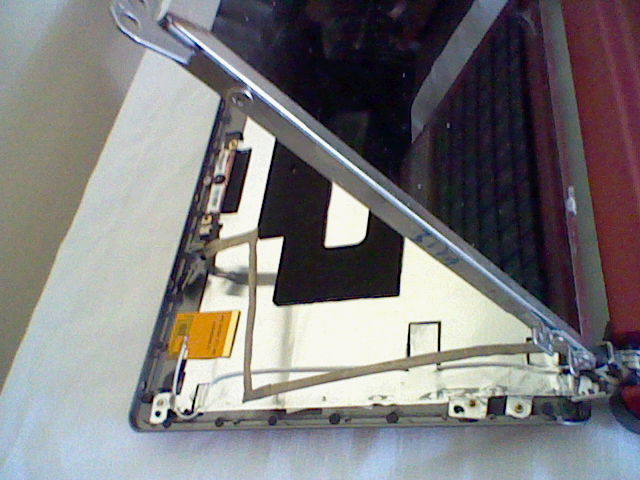
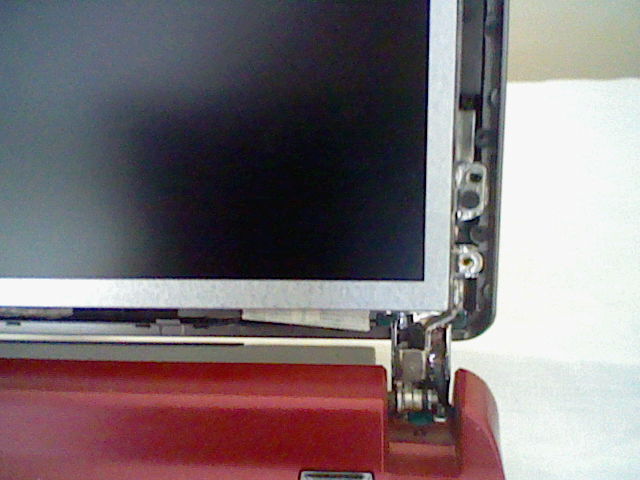
- Very carefully, remove the tape holding the VGA connector and then push backward on the metal connector to release the cable.
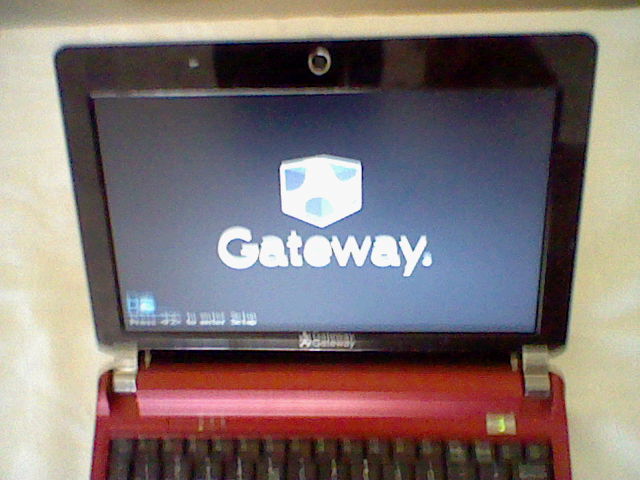
- Now, you are ready to install the new monitor by first replacing the VGA connector. At this point, should you feel brave or technically capable, you can test the monitor by connecting power and turning on the Gateway netbook. I did this and verified that the monitor replacement worked.
- Finally, repeat steps 13 – 1 in reverse order and you will be done with the LT2030 LCD monitor replacement!
The whole procedure should take less than 15 minutes for a moderately experienced PC repair technician. Since no dis-assembly is required for this version of the Gateway LT2030u netbook screen replacement, you can work with the confidence of knowing that your computer will not be adversely affected by any portion of the repairs.
DISPLAY QUALITY
After looking at the quality of the display image and discussing it with my coworker, we both agree this is a true replacement LCD for the Gateway LT2030 netbook. We could see no difference in quality and felt the netbook was usable at its original function again. Remember, this particular display is a replacement and not really an upgrade.
FINAL THOUGHTS
The local computer repair shops in Lake Charles, Louisiana were quoting a cost of over $300 just to do the same job described above. I paid just $48.48 for my Gateway LT2030U replacement LCD screen. The only thing that will be hard about this type of computer work is waiting for the 10.1″ replacement netbook screen to come in!