
No more messy whites...
Overall
Summary
You will hide the bottom line completely the first time with this…
Pros
Light weight, compact design, and dry…
Cons
None at all!
I am one of those people who like to try out the newest and the greatest products. Likewise, I tried out this Liquid Paper Dryline Grip Correction Tape just to see if it was any better than the good old white-out. Believe me, when I say this, I never went back to using white-out after trying this no-mess correction tape.
WHAT IS IT?
This is the newest thing in whiteout technology. You will be able to correct mistakes without the need of waiting for the white out to dry, or the mess that is associated with it. This correction tape is in a sleek dispenser that is comfortable to hold and easy to use at the same time. All in all, it will also save you a bunch of time too.
PRICE & AVAILABILITY
I usually shop at Staples for my office supply needs because I have always had a good experience with them (I use them for my office supplies at work). Staples online store has these Liquid Paper Dryline Correction Tapes for about $3.29 each or $4.79 for a two-pack. I usually buy the 2 pack because it is clearly the better deal. Staples always has these in stock so I never have to look anywhere else.
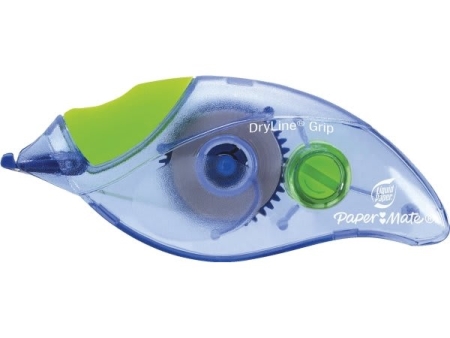
DESIGN & DESCRIPTION
This unit is about 4 inches in length and about 2 inches in height; it small and lightweight. There is a green grip on top of the dispenser that helps make your grip comfortable and firm. The whole dispenser is see-through so you will know when it runs out. This unit is designed carefully so that there are no sharp edges that have the tendency to hurt our blind fingers. The front of the dispenser is where the correction tape feeds out of and the used tape feeds back in. It is a great design that makes your correcting needs fast, efficient, accurate, and without any mess. Just throw away the dispenser when the correction tape runs out because for the price you do not have to worry about the budget.
The correction tape itself is exactly 5 millimeters (mm) wide and about 8.5 meters (m) long in each dispenser. This is good enough to cover all normal-sized prints, but you can always cover something more than once if it is larger in size.
USAGE
First of all, if you need to correct something, just make sure whatever it is that you are writing on is on a flat surface or is hard enough so it does not bend when force is applied on it. Then hold the correction tape dispenser in your hand with the green finger grip on the top and put your index finger on the grip. Align the tip of the dispenser on the page you are writing on and drag the dispenser across until you have corrected the mistake. When you reach the end of the line, just tilt the dispenser forward to shear the correction tape and lift the dispenser. You can repeat this if the mistake is not fully covered. That is all you have to do to make a correction; you do not have to wait for it to dry like the old liquid white outs.
EXPERIENCE
So far I have used this correction tape for my school work and personal needs, but I am also planning to purchase some for work as well and get rid of that liquid white-out. I did not have any problems understanding how to use this thing, but there are instructions to help you get the hang of it. Just make sure the green finger grip is always on top and you will not make another mistake with this correction tape.
I make a lot of mistakes when I write, but sometimes I also make mistakes when typing (things that the spell check misses). So in the proofreading stage, I usually highlight, underline, and white-out a lot of text; now I do not have to wait for the white paint to dry because time is of the essence when I am proofreading an essay or something (I usually write my papers at the last minute so you can guess why I need all the time I can get).
My handwriting is sloppy so I usually need to cover the text twice or sometimes three times to fully hide it, but with printed text (usually 12 points) all it takes is one single line of correction tape to cover the whole thing. Just make sure that your correction tapes do not overlap because the edges tend to wrinkle when the tip of the dispenser slides against it (if this happens just use your fingers to flatten it).
I think that this new design and dry tape are what make this such an upgrade from the old liquid white outs. The compact design simplifies the storage needs and provides better handling. The dry correction tapes eliminate the time needed to dry those messy liquid white outs.
Oh yeah, this tape is thin enough that when I copied a page with corrections made using this tape, I did not see any shadows which amazed me. I never did go back to the liquid kind of correction tool. In fact, I think I do not even remember what they are anymore.
FINAL THOUGHTS
After using these correction tapes for a year or so, I have absolutely forgotten about the messy liquid white-outs that I always got on my hands and sometimes clothes. These tapes not only save you time, but they are also lightweight and compact so they are easy to store and use. If you do not believe me, just try one for yourself if you can spare about four bucks.