Quiet cool and inexpensive!
Overall
Summary
A very well made CPU cooler for the average user who does not need overclocking.
Pros
Very quiet, silver/chrome look and will fit almost all cases.
Cons
Not made for extreme overclockers and fan can be loud when under load.
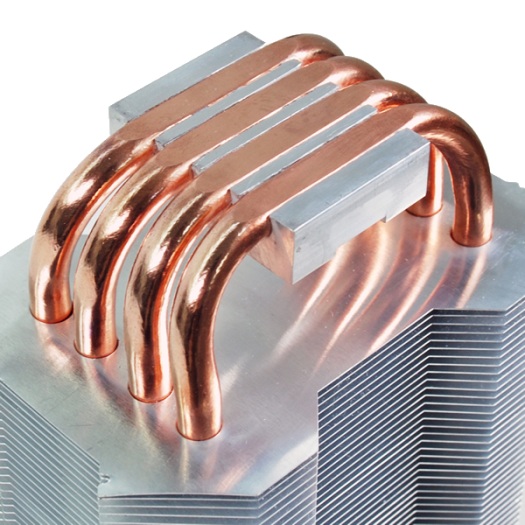
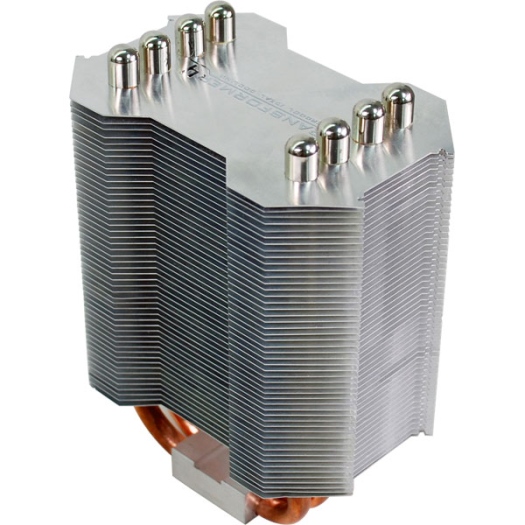
We test as many CPU coolers as we can because you just can’t ever have enough cooling in any system. So today we are testing the Evercool Transformer 4 CPU cooler on our brand new rig to see how it cools that. This CPU cooler has four heat-pipes with large aluminum fins to cool effectively. We will not be able to compare the results of the results from this test with our previous CPU cooler tests because of our new test system.
We upgraded the motherboard, CPU, memory, and video card so the results are expected to be different. The rig is more powerful so a more powerful cooling system is needed. Let’s see how the Transformer 4 performs.
LOOK AND FEEL
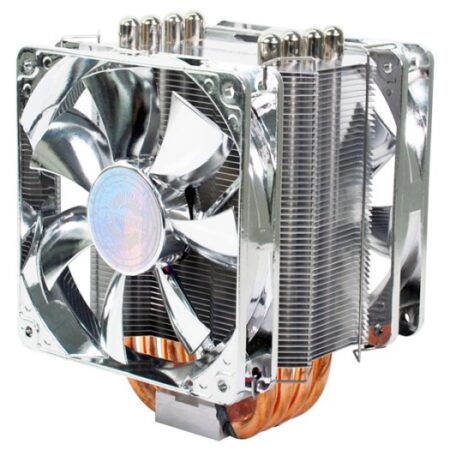
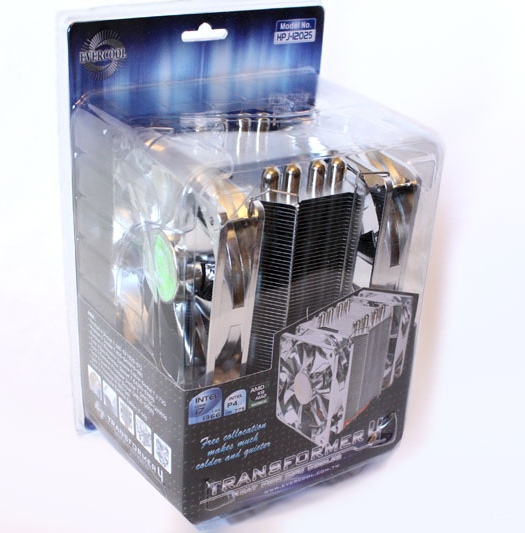
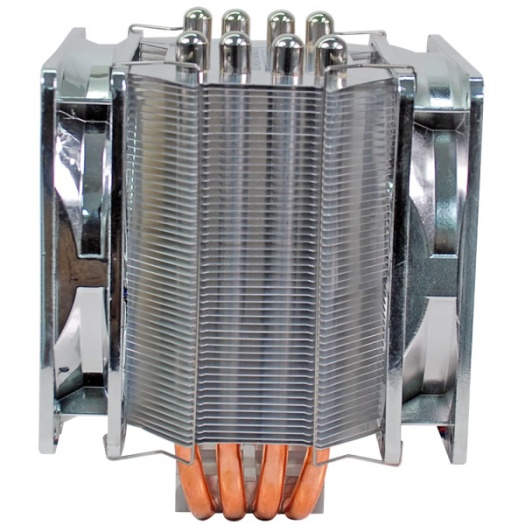
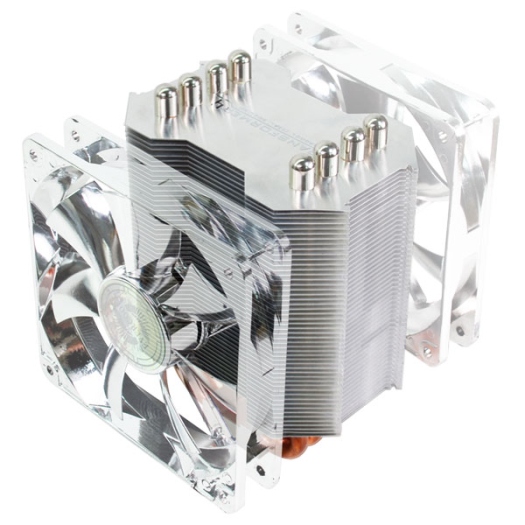
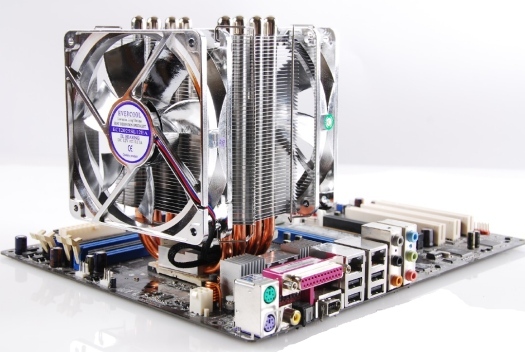
The Transformer 4 comes in clear plastic packaging that give you a clear view of the contents inside (the cooler itself). Inside the package, you will find two 120mm cooling fans, the Transformer 4 heat-sink itself, AMD and Intel installation hardware, a backplate, and a thermal compound. The heat sink itself has is made of aluminum fins with copper heat-pipes that go from the base and through the fins. There are two 120mm silver cooling fans that affix on either side of the heat-sink to cool your CPU. The cooler weighs about 845 grams–not too heavy. The fans are silver/chrome, the same as the aluminum fins so they blend in to give a nice and sleek look.
TEST SYSTEM
| Motherboard | Gigabyte GA-870A-UD3 AM3 (USB 3.0) |
| CPU | AMD Phenom II X4 965 Black Edition 3.4GHz (4 cores) |
| RAM | G.Skill Ripjaws Series 4GB (2 x 2GB) 240-pin DDR3 PC3 12800 |
| Graphics Card | PNY GeForce Verto GTS 250 1GB |
| Storage | Seagate Baracuda 320GB SATA (3.0 Gb/s) |
| Power Supply | Thermaltake Thoughpower XT 775W |
| Optical Drive | Sony CD/DVD RW |
| PC Case | Thermaltake Element G |
| Case Cooling | Various Intake and Exhaust Cooling Fans |
| Operating System | Microsoft Windows 7 Enterprise 64-Bit |
INSTALLATION
First of all, you need to remove your old CPU cooler and all related hardware from your motherboard and clean the surface of the CPU (you may need to remove the back-plate too). Attach the HPJ back-plate (with six holes) on the back of your motherboard and bolt it on with the supplied bolts with washers (white). Remove the sticker at the bottom of the heat-sink, and put the “I” shaped bracket in the notch of the heat-sink. Apply a little bit of thermal grease on the center of the CPU and place the heat-sink on the center of the CPU while aiming at the holes of the bolt (I would recommend that you remove the fans before starting the installation). Then use the supplied nuts to secure the heat-sink in place (make sure to tighten the nuts together so you don’t damage anything). Then just install the two fans using the fan clips and plug in the power connectors (you can choose to use just one fan if you want). By the way, do not use any kind of tool to tighten the nuts (thumb nuts) that fasten the heat-sink to the motherboard (this is to prevent over-tightening). Install the motherboard back in the case and install any other necessary component that you removed (video card, memory, etc). Now you are done and ready to use this.

TEST METHOD
First, I will test the system at idle by leaving it idle for 1 hour. Then I will perform a load test using CPU Burn-in v1.01 for 1 hour also. I will use Gigabyte’s EasyTune 6 (ET6) utility to monitor the temperatures. I will then install the Transformer 4 CPU cooler and perform the above tests again. Then we will compare the Stock heat-sink and Transformer 4 test results to see how much improvement we actually get. I will not be able to compare it with any other CPU cooler because this is a totally different test system.
RESULTS
So, looking at the results, we can clearly see that while Transformer 4 is obviously way better than the stock as expected. On idle the stock heat-sink kept the CPU temperature at 51oC and the Transformer kept it at 42oC. On load, the stock heat-sink kept the CPU running at 86oC where the Transformer lowered it down to 70oC. So at both idle and load the Transformer 4 ran the CPU well below 10oC cooler than the stock. This is an excellent improvement for the everyday user and it also gives you room to overclock a little bit if you wanted.

FINAL THOUGHTS
The Evercool Transformer 4 CPU cooler is a very good choice for any low to mid-range computer setup, especially a budget system. The performance is really good and the fans are very quiet. The overall installation was fairly easy but not as easy as one would expect (I am very spoiled by Noctua). The fan provides awesome cooling even if you overclock your CPU a little. The cooler performed very well in all our tests and it beat the AMD stock cooler as expected. I would highly recommend this CPU cooler for anyone looking to cool their budget system and get the best value for their money. A quick search online reveals that you can buy one of these Transformer 4 CPU coolers for well under $40 USD. I am giving this CPU cooler 4 out of 5 because of the performance and low noise. I am also presenting it with our Best Buy award because it is worth every penny you spend on it.